
This Schwinn roadster tricycle caught my eye when it arrived as a donation to the shop I volunteer at. Stylish with swooping lines and in great shape except for lacking one pedal. That missing pedal cripples an otherwise awesome little tricycle.
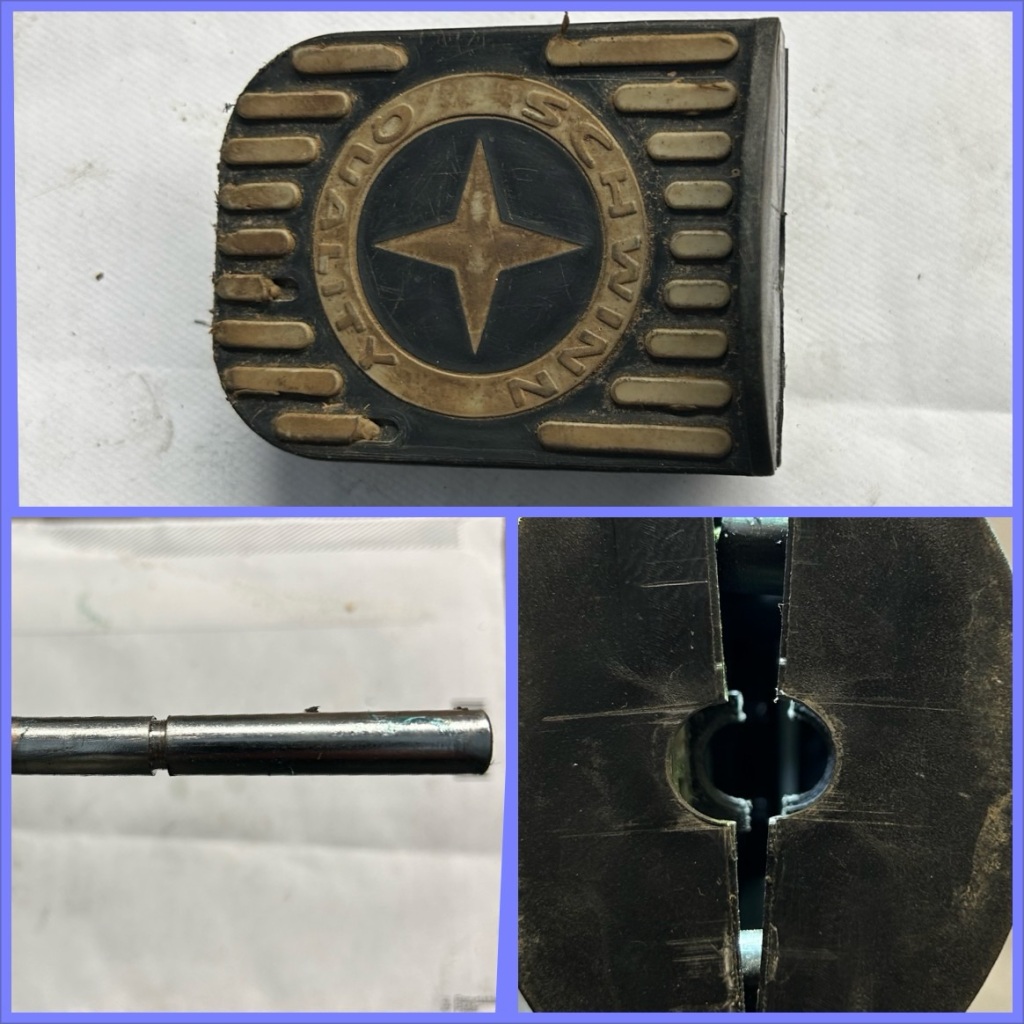
Top of the photo shows the one existing plastic pedal. Bottom left is the spindle it snaps onto, which is part of the crank attached to the front wheel. You can see a notch carved into the spindle. Bottom right is a peek inside of the split pedal. If you look carefully, you can just see the collars inside the pedal which fit into the notch of the spindle. That keeps the pedal from slipping off the spindle.
So, how to get a replacement pedal? The Schwinn brand has been sold many times since Ignatz Schwinn owned it, and is presently owned by a Dutch company. Fifty years ago I could have walked into a Schwinn shop and purchased any replacement part for any of their bikes. Emails to the latest Schwinn corporation went unanswered of course. Crickets. Ignatz would not be pleased.
Amazon has a couple of generic and rather unattractive plastic snap-on pedals, but it is impossible to know if they will fit properly from the flowery description that lacks all the pertinent details. There may be a bike co-op somewhere in the USA that has a junk Schwinn roadster trike I could pull the pedal off of, and I could spend the rest of my life looking for that bike coop. Or I could just buy a brand new Schwinn roadster trike off Amazon for $138 and pull the pedal off that. Either way an otherwise entire nice trike is headed for the landfill, which is rather tragic.
During high school in ‘72 I wrote a term paper on planned obsolescence and landfills. My encounter with this trike illustrates the paper very well. It seems the current owners of Schwinn would prefer their customers buy a new trike if a pedal fails or is lost.
So, why not make pedals for it? 3D printing is one way to make things, but I don’t know how to do that. Also, the plastic object made with 3D printer does not have the durability of an injection molded plastic product. 3D printing is particularly useful for making prototypes or plastic objects that don’t require much strength. So I thought why not see what I can do with steel and wood?

I had some 1/2″ steel tubing that was a good fit over the spindle. I cut notches into it that a piece of washer would fit into. Then I silver- brazed the washer pieces into the notch of the tube, so they will catch the existing notch in the crank spindle. Now I had a sleeve that would rotate around the pedal spindle and won’t slip out. Next I would make a wooden pedal to fit over it.
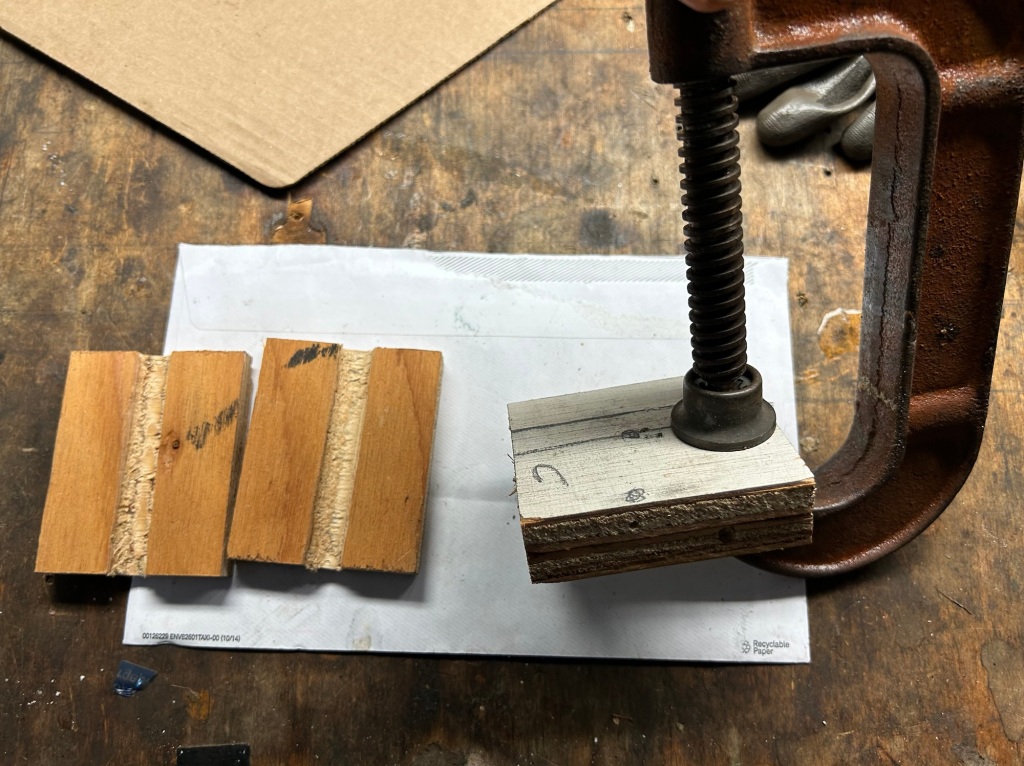
Here I have 3/8” plywood rectangles I cut with the table saw. I then used a dado blade to cut a shallow channel down the center of them in the middle where they will be glued together over the tube. After clamping them together I was able to drill an accurate hole down the center of them with a hand drill, using the dado cuts as a guide. The above photo is after the 1/2” hole was drilled.

Next, I put some clear gorilla glue on the tube I want to glue the pedals to. This glue bonds with both wood and metal. Then I moistened the wood where the tube will be, which is needed when using gorilla glue. Also I put exterior grade Elmer’s carpenters glue on the wood faces. Now it’s time to clamp the pedals together!

The pedal halves are glued together over the pedal spindles, held by lots of clamps.

Now that we have some spinning pedals, I will glue some emery cloth to the pedal surface so the toddlers shoe won’t slip off.

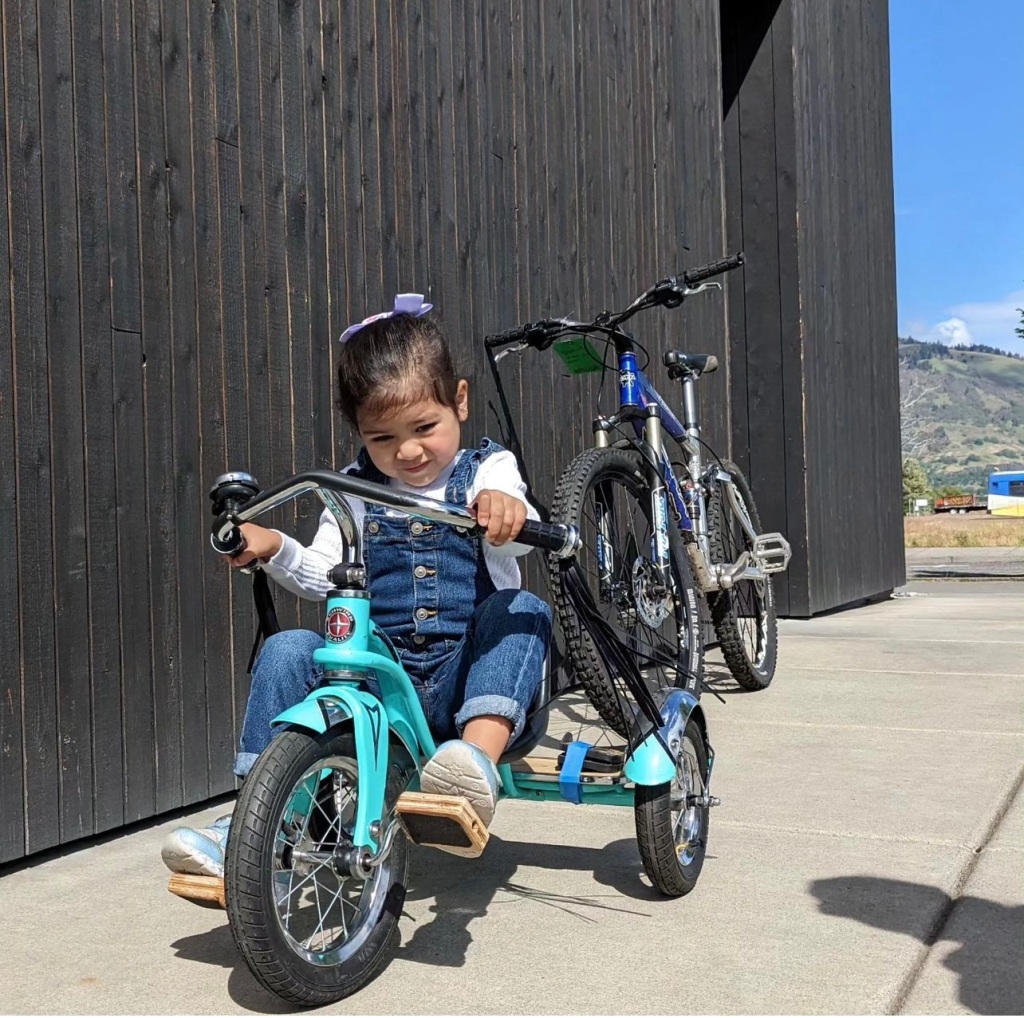
Emery cloth has been glued to pedal platforms to provide some grip, and an inner edge was incorporated to help keep the toddlers foot in the right place (which you can see if you zoom in). This trike is ready to rumble. Next step is to get it in the hands of a family that is ready for it!
END
